In How to Warp a Chipboard Loom, I shared two ways to warp your loom: continuously and individually. The first allows you to weave on one side and the second allows you to weave the entire board, front to back. (Pictures to come.)
Individual warping takes some time. If you want to warp quickly and still use both sides of the loom, there is still another way to warp. If you purchased a prewarped loom from me at Stitches West, in Santa Clara, then you may have a loom warped in this manner.
In this third way to warp the loom, the warp is wrapped continuously around the loom. Normally, this leaves the reverse lacking one warp end. I've modified the looms, by drilling two neat holes at opposite ends. This allows the opposite ends of the warp to be anchored at the back of the loom and creates the missing warp end. It also creates an additional warp end. Whenever you weave, starting on the front, the tail of the additional end will be closest to your work when you turn the board over. Pair that extra with the line of warp next to it and weave over/under them as one. Treat the other end as what it is, a continuation of the end that began on the front of the board, passing over and under it on return, as you weave the back side.
Because this style of warping leaves no extra, you will need
to begin weaving at least an inch from the notches, and finish weaving
at least an inch from the notches, on the reverse. When you snip the
warp, close to the notches, this will leave you just enough to finish the ends of your cloth.
If you need longer ends, just begin and end farther from the notches.
When you are done, loosen the two anchored ends of yarn from the board, so that they hang free, and snip your work free from the loom, as close to the notches as possible. You can then trim the two longer ends to the same length as the others.
Chipboard Looms can be found at vika.etsy.com
Showing posts with label DIY. Show all posts
Showing posts with label DIY. Show all posts
Monday, March 9, 2015


Tuesday, February 24, 2015
How to Warp a Chipboard Loom
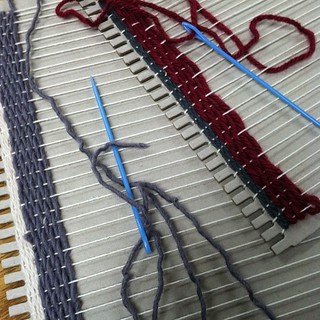
Continuous warp. Weaving on one side, only.
Hold your yarn at the lower back side of the loom and wrap up and over the first notch, toward the front. Continue through the bottom notch that is directly opposite. Keep wrapping until you have reached the final bottom notch. Pass the yarn through this last notch and turn the loom over.Tie the start and finish ends together, diagonally, across the back of the loom. You are now ready to weave, on the opposite side.
When you are done weaving, turn the loom over, so that notches are to your left and right. Using scissors, cut through the warp yarns, at their midpoint. Trim off the knot that is left from the diagonal tie.
Removing the Cloth
Remove the cloth from your loom and position a fringed side so that it is facing you. If you have used every notch, there should be an odd number of warp yarns. Treat the first two as if they were one: hold them together while picking up the third piece of yarn and tying a "shoelace knot." Gently snug the knot down to the weft. When this is done, tie a shoelace knot again, gently pulling until the knot is firm. Pick up the next two warp yarns and repeat, tying a shoelace knot that snugs the weft, and another to make a firm knot. Do this for all of the warp yarns on one side and then turn your work around and do it for all of the warp yarns on the other side.If the fringe is too long for you, fold your work in half so that both fringes are on the same side. Slide the fringe over the edge of the table until the length you want ends at the bottom edge of the table. Making sure things are all even, hold your work down firmly and use the bottom edge of the table to guide your scissors in a straight line, as you cut the fringe.
Handwash according to the fiber you've used, to full it, or firm it up.
The work at right was done by my 3rd grade students, on 13x13" chipboard looms. They warped the looms themselves and all are first time weavers!
Individual warp. Weaving on both sides.
 | |
| Each warp end tied into a bow |
Take each length and bring it through a bottom notch on the board. Draw the ends up to the notch exactly opposite and tie a bow there. Make all your bows on the same side. Now, you can weave from the bows end, down the loom to the bottom. Add a few extra rows of weft when you reach the bottom notches--you'll need them to fill the slight gap that will result. Turn the loom over and continue weaving from the bottom, up to the bows, at the top. When you are done, untie the knots and unfold your cloth from the loom. Ease the extra rows of weft into balance.
From tying the fringes through fulling, the remaining instructions are the same as those for removing the cloth, above.
Warning:
Never warp a chipboard loom so that the warp is looped around the pegs, as you might with a wooden loom. The tension will break the pegs off.
If you ever do happen to break a peg, go to a coffee shop, have a coffee and save your wooden stirring stick. Bring it home and snap off an inch or so from both ends. Using wood glue, glue one on each side of the peg, with round ends out.
Chipboard Looms can be found at vika.etsy.com
Monday, May 26, 2014
Low Sugar Strawberry Jam
 I learned how to make jam in my late teens, from a woman whose mother and father were Polish immigrants. The tedious job of processing the fruit --washing, removing pits, slicing, mashing--fell to me.
I also poured the paraffin she used in addition to bands and seals. Since, I've learned how to process the jam, just as safely, without the wax.
I love the taste of fruit in midwinter that canning affords, but I've always disliked the amount of sugar necessary to set the pectin.
Too sweet!
However, tons of sugar isn't necessary with the new pectins. Both instant pectin and low-sugar pectin make an excellent, tasty product. At least one company also offers a "scalable" pectin. You measure the right amount of pectin for the job: you can use a smaller amount of fruit and an every-day pot, instead of being chained to making a big batch in a stock pot or dutch oven. And, it's quick.
I usually make some variety of apricot jam, however, this year a gift changed things. A family at the local farmers' market produces ripe juicy strawberries you can smell from half a block away. I always buy from them, for the last several years, however, at the first market, they had sold out by the time I got there! All that was left was a basket of culls...which they offered me, for free, saying it would make delicious jam. It did. This week, I went back for 9 baskets and tried low-sugar jam, hot water bath processed.
 |
| 6 Cups Mashed Strawberries 4 Cups Sugar Pectin |
It started to set, right away-- no strawberry syrup, here.
Only four cups of sugar, compared to the usual 6-8...and the fruit flavor is just amazing. It tastes fresh. This is the jam you want to use for cakes and fancy sandwich cookies.
Monday, May 19, 2014
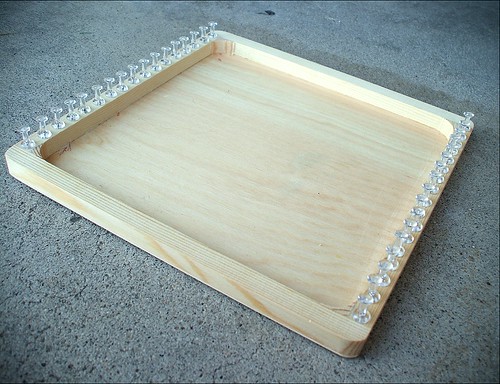
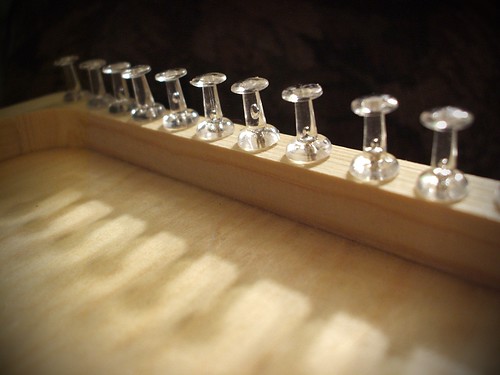
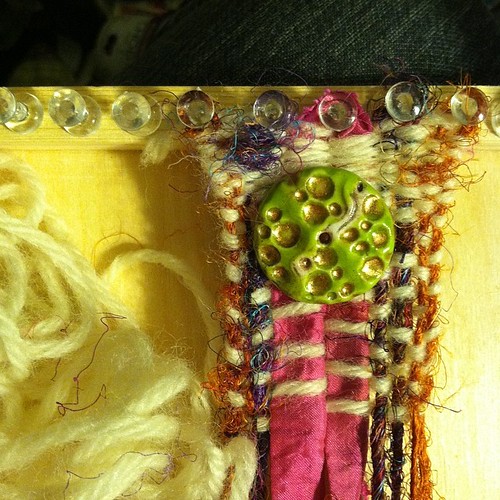
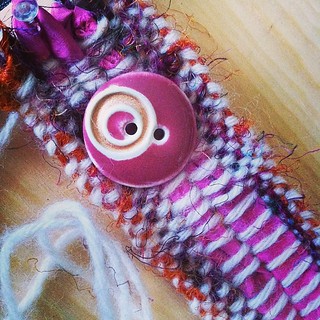
Handmade Peg Loom and Woven Cuff
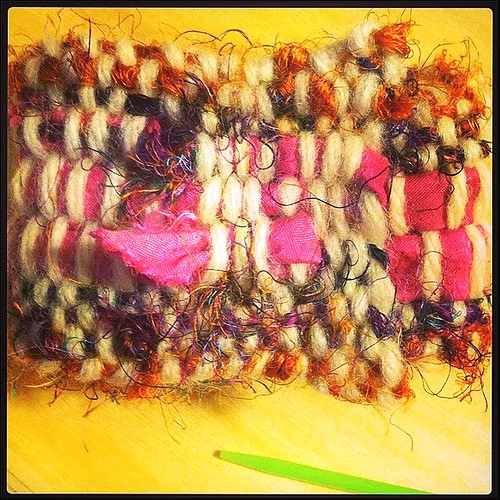 | |
| I really enjoy adding the color and texture in the warp, and using a plain weft. I think it will look especially nice in a narrow/long scarf. |
Sunday, April 20, 2014
Wool Soap Sock
Large oblong bars of soap are my nemesis. They won't stay put in the shower. They pop out of my grasp and go flying. The deeper dish that finally captures them also turns them to mush, as they sit in the puddle, at the bottom. I like the felted soaps, but what I really wanted was an updated version of my loofa.
What if...
I bought this little pocket loom, on a whim, a couple of months ago. It looked handy and easy to pack along. I also have some pure wool yarn I've been eager to play with. Well, actually, I had already played with it and created a mini-monstrosity that needed to be ripped out. Sometimes, stuff doesn't work.
So I ripped it out and doubled the yarn. By doubling the yarn and not using all of the pegs on the loom, I hoped to created a very tight tube for my soap. Why so tight and doubled? I hope that as the soap shrinks with use, there will be enough tension and enough fiber to allow the tube to remain fitted, and not sag around the soap.
So far, so good. It's snug, it felts with use, I can hang it up so it dries out thoroughly, and it's just the right amount of rough. We'll see if my "shrink-to-fit" plan works out...
What if...
 |
| I've left two pegs out of the job. |
So I ripped it out and doubled the yarn. By doubling the yarn and not using all of the pegs on the loom, I hoped to created a very tight tube for my soap. Why so tight and doubled? I hope that as the soap shrinks with use, there will be enough tension and enough fiber to allow the tube to remain fitted, and not sag around the soap.
 |
| The full picture. |
 |
| I drawstring finished this end. |
 |
| Binding off. Waxy colored pencils don't leave any marks. |
 |
| This soap is bulky. After drawing it closed, I also added a finger- crocheted loop. |
 |
| My handspan (length) is about 7" |
So far, so good. It's snug, it felts with use, I can hang it up so it dries out thoroughly, and it's just the right amount of rough. We'll see if my "shrink-to-fit" plan works out...
Wednesday, April 16, 2014
From Nail Buffer to Sanding Tool
 Working in mixed media, I enjoy borrowing tools from other arts and trades, and using them in unconventional ways. Even more, I enjoy modifying and creating my own tools.
I was in a dollar store one day, when I realized a beautician's nail-buffing tools might also be excellent for finishing metals. They were! However, the sanding papers didn't hold up under water and the grits, intended for acrylic nails, were quickly depleted.
So, I combined the beauty shop and the auto shop to make a new tool.

Taking wet-dry sandpapers in very fine,1500, 600 and increasingly coarser fine grits, I cut strips of each in exactly the same size as those on my buffing bars.

Fine, wet-dry sanding papers can be found at OSH hardware stores, near the paint section. If you don't find them in your hardware store with the sandpapers, near the paint, or with wood finishing products, try an auto shop--they should be able to tell you where to acquire the product, locally.
.
 Carefully peeling off the old strips, I discovered there was still quite a bit of adhesive left; they were ready to go (a thin layer of E6000 glue would have been my go-to, had that not been the case).If you find the padding has degraded, try craft foam with the adhesive backing, as a substitute.
As a bonus, I also discovered the end caps were removable and the interior is large enough to hold the fish-hook sharpener I use for making pins.
Subscribe to:
Posts (Atom)